WDIO CLI Options
WebdriverIO comes with its own test runner to help you start testing as quickly as possible.
Fiddling around hooking up WebdriverIO with a test framework is a thing of the past. The WebdriverIO runner does all the work for you, and helps you to run your tests as efficiently as possible.
Starting with v5, WebdriverIO's testrunner is bundled separately in the NPM package @wdio/cli.
Install it like this:
npm install @wdio/cli
To see the command line interface help, just type the following command in your terminal:
./node_modules/.bin/wdio --help

wdio <command>

Commands:
  wdio config                           Initialize WebdriverIO and setup configuration in
                                        your current project.
  wdio install <type> <name>            Add a `reporter`, `service`, or `framework` to
                                        your WebdriverIO project
  wdio repl <option> [capabilities]     Run WebDriver session in command line
  wdio run <configPath>                 Run your WDIO configuration file to initialize
                                        your tests.

Options:
  --version  Show version number                                       [boolean]
  --help     Show help                                                 [boolean]
Sweet! Now you need to define a configuration file where all information about your tests, capabilities, and settings are set. Switch over to the Configuration File section to see what that file should look like.
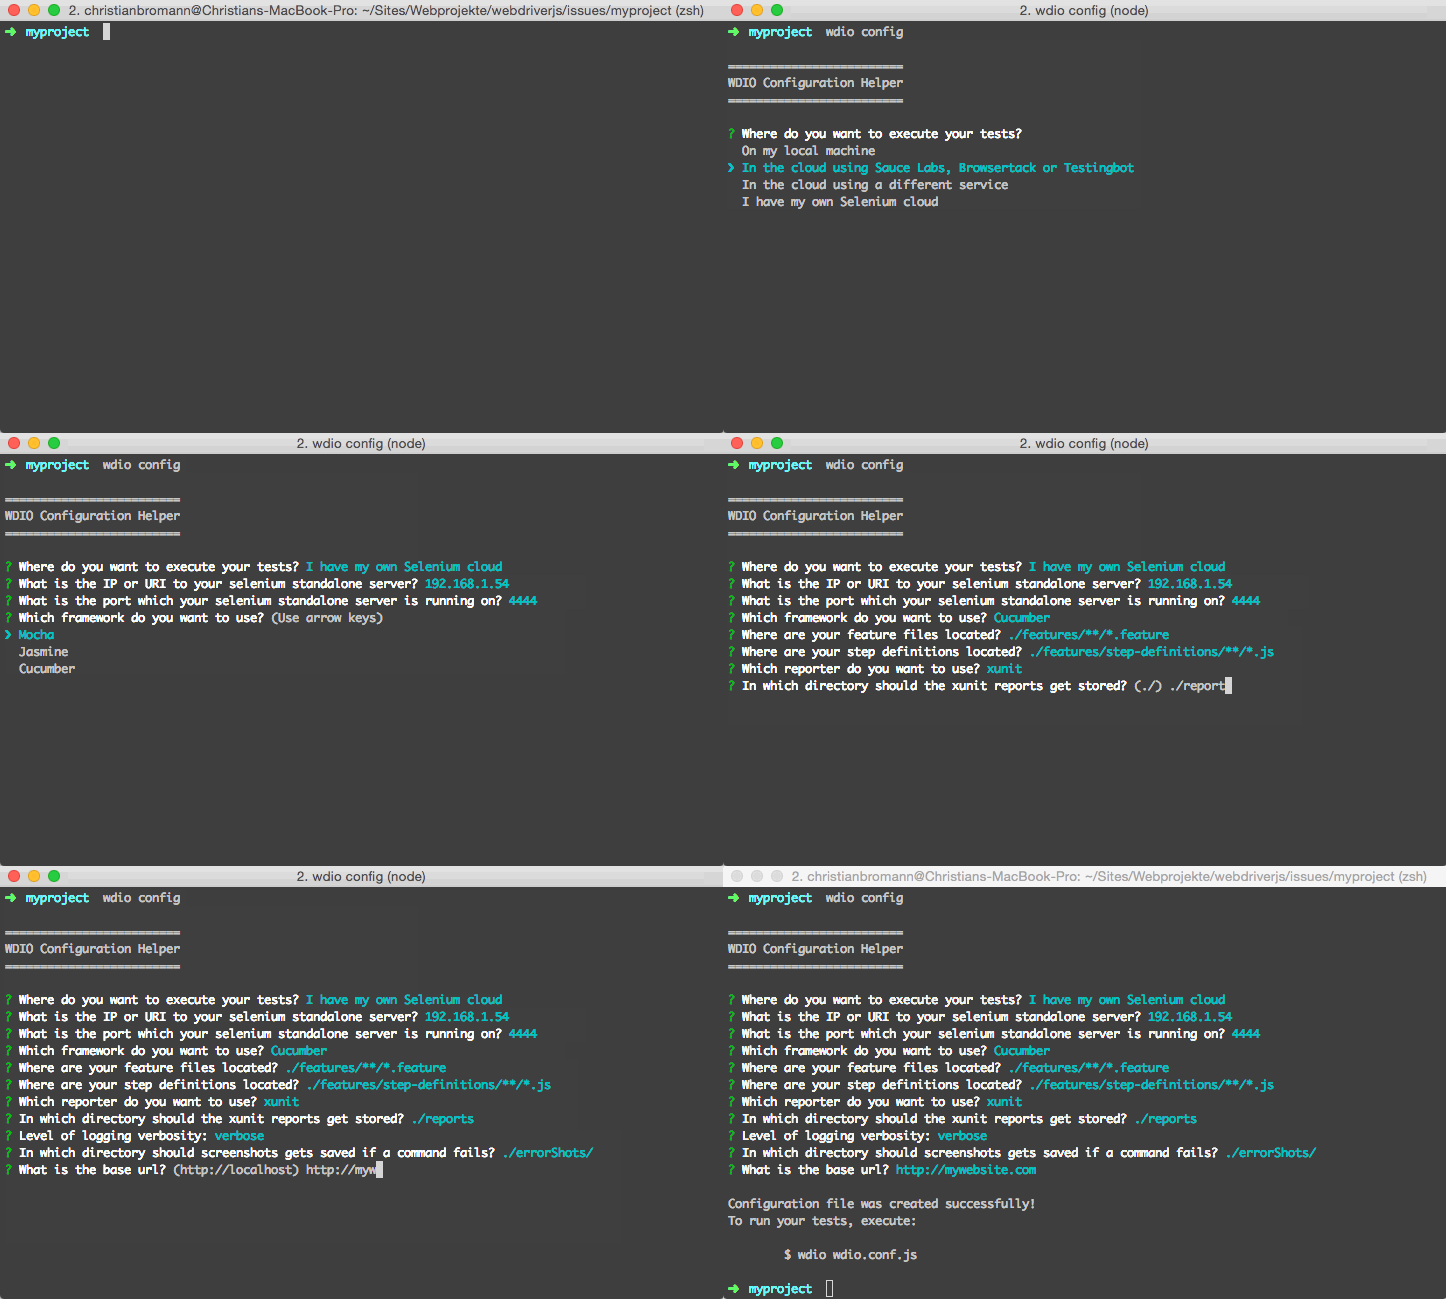
With the wdio configuration helper, it is super easy to generate your config file. Just run:
./node_modules/.bin/wdio config
...and it launches the helper utility.
It will ask you questions and generate a config file for you in less than a minute.

Once you have your configuration file set up, you can start your tests by running:
./node_modules/.bin/wdio run wdio.conf.js

# you can also initalize your configuration without the `run` command
./node_modules/.bin/wdio wdio.conf.js
That's it! Now, you can access to the selenium instance via the global variable browser.
Commands
wdio config
The config command runs the WebdriverIO configuration helper. This helper will ask you a few questions about your WebdriverIO project and create a wdio.conf.js file based on your answers.
Example:
wdio config
Options:
--help            prints WebdriverIO help menu                                [boolean]
--npm             Wether to install the packages using NPM instead of yarn    [boolean]
wdio run
This is the default command to run your configuration.
The run command initializes your WebdriverIO configuration file and runs your tests.
Example:
wdio run ./wdio.conf.js --watch
Options:
--help                prints WebdriverIO help menu                   [boolean]
--version             prints WebdriverIO version                     [boolean]
--hostname, -h        automation driver host address                  [string]
--port, -p            automation driver port                          [number]
--user, -u            username if using a cloud service as automation backend
                                                                        [string]
--key, -k             corresponding access key to the user            [string]
--watch               watch specs for changes                        [boolean]
--logLevel, -l        level of logging verbosity
                            [choices: "trace", "debug", "info", "warn", "error", "silent"]
--bail                stop test runner after specific amount of tests have
                        failed                                          [number]
--baseUrl             shorten url command calls by setting a base url [string]
--waitforTimeout, -w  timeout for all waitForXXX commands             [number]
--framework, -f       defines the framework (Mocha, Jasmine or Cucumber) to
                        run the specs                                   [string]
--reporters, -r       reporters to print out the results on stdout     [array]
--suite               overwrites the specs attribute and runs the defined
                        suite                                            [array]
--spec                run only a certain spec file - overrides specs piped
                        from stdin                                       [array]
--exclude             exclude spec file(s) from a run - overrides specs piped
                        from stdin                                       [array]
--mochaOpts           Mocha options
--jasmineNodeOpts     Jasmine options
--cucumberOpts        Cucumber options
wdio install
The install command allows you to add reporters and services to your WebdriverIO projects via the CLI.
Example:
wdio install service sauce # installs @wdio/sauce-service
wdio install reporter dot # installs @wdio/dot-reporter
wdio install framework mocha # installs @wdio/mocha-framework
If your project is using package-lock.json instead of yarn.lock, you can pass a --npm flag to make sure the packages are installed via NPM.
wdio install service sauce --npm
List of supported services
sauce
testingbot
firefox-profile
selenium-standalone
devtools
applitools
browserstack
appium
chromedriver
intercept
zafira-listener
reportportal
docker
wiremock
List of supported reporters
dot
spec
junit
allure
sumologic
concise
reportportal
video
html
json
mochawesome
timeline
List of supported frameworks
mocha
jasmine
Run the test runner programmatically
Instead of calling the wdio command, you can also include the test runner as module and run it in an arbitrary environment.
For that, you'll need to require the @wdio/cli package as module, like this:
import Launcher from '@wdio/cli'
Or, for ES5:
const Launcher = require('@wdio/cli').default
After that, create an instance of the launcher, and run the test.
The Launcher class constructor expects the URL to the config file, and an opts object with settings that will overwrite those in the config.
const wdio = new Launcher('/path/to/my/wdio.conf.js', opts)
wdio.run().then((code) => {
    process.exit(code)
}, (error) => {
    console.error('Launcher failed to start the test', error.stacktrace)
    process.exit(1)
})
The run command returns a Promise.
It is resolved if tests ran successfully or failed, and it is rejected if the launcher was unable to start run the tests.